Tuesday, August 22, 2006

Prep work from the inside out . . .

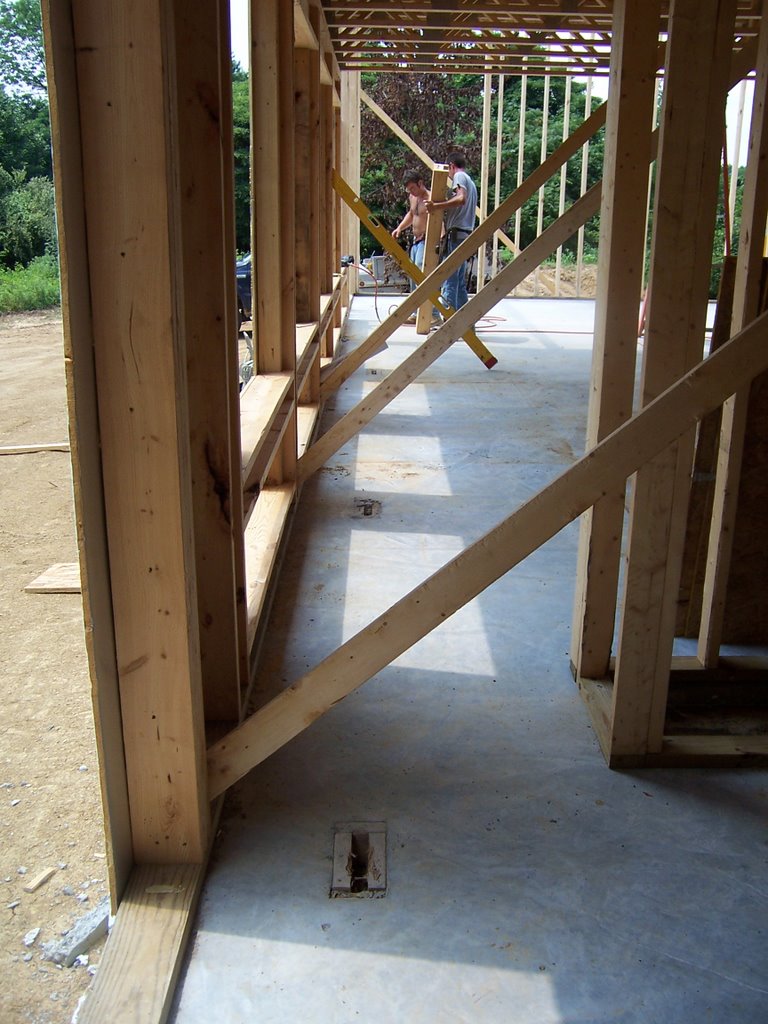
Well, since the completion of the framing, work has continued, but at a somewhat slower pace. The shed is nearly complete, and we have been preparing the exterior for siding and roofing. On the interior, we've been setting up our air handlers in the basement and preparing for ductwork installation. You can see the initial setup in the first photo below.
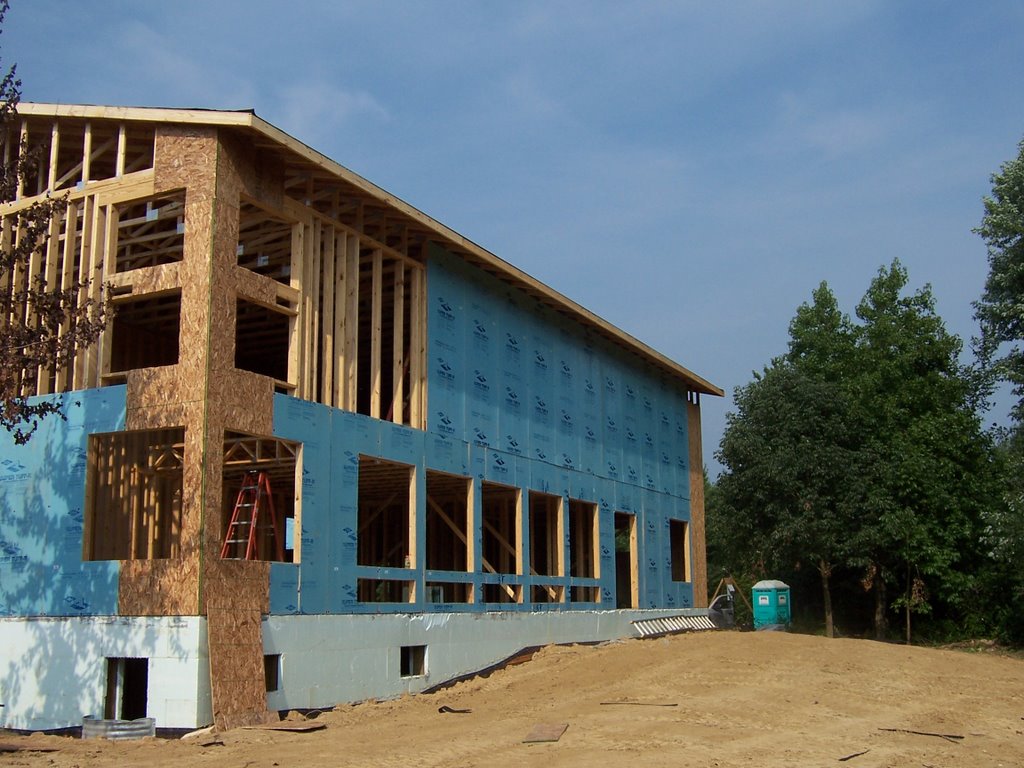
The exterior was fitted with 1/2" thick, 2 inch wide treated plywood furring strips over top of the 1/2" foam insulating sheeting to create an airspace behind the siding. This is called a ventilated rainscreen siding installation technique and ensures that your substrates stay dry and ventilated. We also had to trim out around the windows with the same material. Basically we spent a few evenings on the table saw ripping the plywood strips and then installed them over the sheeting at the stud locations every 24". You can see an area of strips and the window furred out in the photo below.

Construction Waste Management: This means that we are very conscious of where the materials on our site go. We have no dumpster on site and we recycle everything we possibly can. We have a centralized cutting area so all scraps are seperated by lengths so that they can be found and used easily. In the photo below, you can see that we took all of the cardboard packaging materials from our exterior windows and doors to a local recycling bin. We also bring home the plastic beverage bottles and cans that the crew uses and place it in our residential recycling.
The photo below shows a very good example of passive solar design. You can see that the enlarged overhang (24") extends out and shades the second floor windows. In the winter, the angle of the sun will be lower and thus the sunlight won't be blocked by the overhang. Instead the sunlight and it's heat will be allowed to enter the home's south windows and heat the interior spaces. You'll notice that the first floor windows are currently drenched in sunlight - but not to worry, custom designed and made perforated metal sunshades will eventually hang above the first floor windows and shade them throughout the late spring to the early fall. The east and west windows will be shaded from the hot summer sun by deciduous trees which will loose their leaves in winter and also permit the light and heat when it's needed most. (See the shadow that the tree is already creating on the west side of the house in the photo below?)

Friday, August 11, 2006

Windows are in!

Here are a few photos from today. I took Kenny lunch at about 11:30 am and the window installer had about 6 windows and 1 door left to install.

Here is an exterior of the east elevation with windows.
The south and west sides with windows (looks really cool, ay?)
Installing the doors on the north side
The west side windows being installed

Here's an interior view of the great room windows.
Here's Kaila's room with windows installed.
Well here are the latest few photos. The windows and exterior doors are being delivered this afternoon and installed tomorrow. The installer said all windows should be installed by the end of the day tomorrw.
Here is the newly installed stair going up to the second floor.The basement after being pumped out. Now we only have to wipe the grunge off the walls at the water line - you can see about 6 inches above the floor. It's ok, though. The foam doesn't rot, mold, or mildew - so no worries - just wipe and go.
The newly installed stair down to the basement.
Kenny and the kids from my bird'seye view in the loft.
The view out the southwest corner of the great room.

Wednesday, August 9, 2006

Framing's Almost Complete

A view from the loft looking down to the great room.
From the loft looking back down the hall toward bedrooms.


Kenny and Kaila up in the loft.
A view of the loft and kitchen and dining from the great room.
The approach.
Great room, dining room, and kitchen passive solar gain windows.
The tall series of windows in the great room corner.

Tuesday, August 8, 2006

Like A New Hat . . .

View of the southwest corner.
A little more to the left, please?
I love the smell of trusses in the morning!
The sixth man award for the day goes to . . .

They finished putting the roof trusses and sheeting on the house today! On tap for tomorrow is finishing exterior wall sheeting, stairs, and second floor interior framing. Click on the pics to enlarge!

Thursday, August 3, 2006

Another Day, A Lot More House

Today was a very productive day! Kenny has worked with the crew most of the week. He wanted me to remind everyone that we have been under a severe weather advisory - it's been in the high 90-degree temps with 70% humidity. (That's a heat index of about 105 degrees.) I worked today too - painting the shed siding, cleaning up the site, and taping joints on our exterior foam sheeting.

Above is the view down the stairwell to the basement - er, ah, pool. (You wouldn't believe how many tadpoles are taking up residence down there!) Seriously, we'll be pumping out the basement as soon as we get "dried in" or under roof. Below is the view out the garage door openings.

Here is a view of the great room being framed. Yes, the whole thing is continuous 2x6, 18 foot tall studs. They are spaced 12" OC. We needed this structurally per our engineer, but it was a real pain getting it framed today.
The other picture shows the sun coming in the low windows along the great room floor - this really shows the impact that the passive solar design will have on the house.

Wednesday, August 2, 2006

The Framers Rock

Here are pics from the end of the day yesterday - Tuesday. Framing began a week ago yesterday, but we missed 1 and a half days due to rain. So this is basically progress from 4 and a half days of framing. Of course these are in reverse order again. One day I'll figure out how to load these images! Below is the garage, with framing nearly complete. You can see the header over the door on the right and there will be another on the left. Also notice the high window on the wing wall to the far left.
Above is an exterior view of the south wall. Below is the interior view of that same wall, but from the interior view, you can see where the second floor windows will be.

Above is an interior view of the dining room looking out the south windows. The open web floor trusses above will remain exposed - as will the ductwork and other mechanicals. Below is an interior view of the Master Bedroom end wall with high window. This room will have a drywall ceiling. Thanks for reading - we should have another update tonight.